MacBook Broken screen repair Hamilton New Zealand
Macbook Broken Screen repair Experts In Hamilton New Zealand AppleFix & Tech engineers Call 078394111 or visit 937 Victoria Street Hamilton New Zealand. Macbook Air M2 Cracked screen repair full tutorial. Macbook Air 2020 screen replacement general guide
Vertical Lines on the macbook LCD screen? Macbook Screen is broken
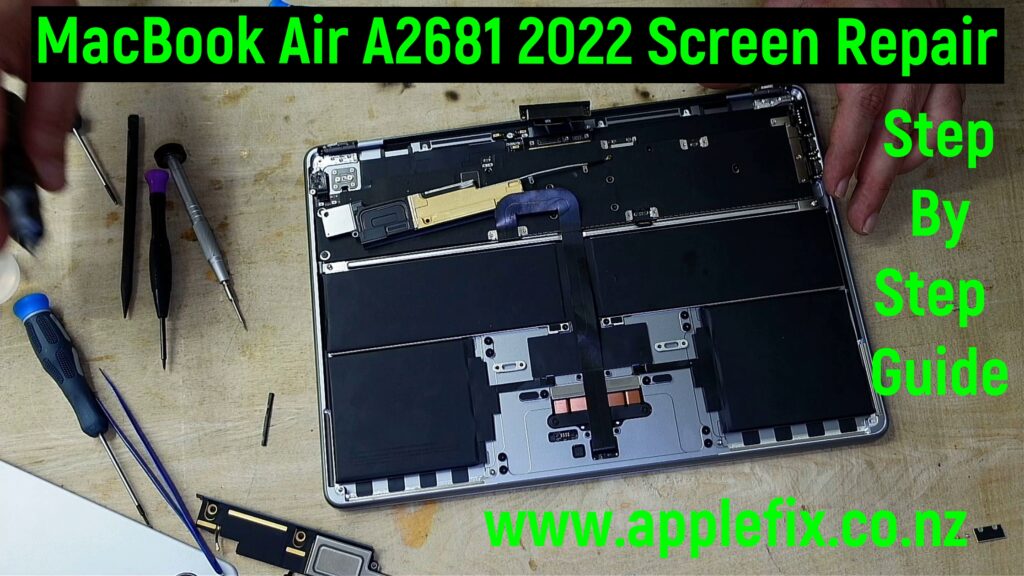
Replacing the screen on a MacBook A2681 (which is part of the MacBook Pro 14-inch model, likely released in 2021 or later) requires a precise process, as Apple devices are known for their compact, intricate design. Below is a general guide on how to replace the screen, but keep in mind that it’s crucial to have the right tools and the necessary replacement parts. Tools and Equipment Needed: Pentalobe screwdrivers Tri-point screwdrivers Suction handle or tool Plastic opening tools Spudger ESD-safe tweezers New screen replacement part Anti-static wristband (optional, but recommended) Step-by-Step Guide: 1. Power Off and Disconnect the Battery Shut down the MacBook completely. Unplug any connected peripherals or power cables. If possible, disconnect the battery to prevent any accidental power on during the repair (though this step may not be necessary for all models, it’s a good practice). 2. Remove the Bottom Case Use a Pentalobe screwdriver (P5) to remove the screws around the bottom of the MacBook. Once all the screws are out, gently pry open the bottom case using a plastic opening tool. Be careful not to damage the case or the internal components. 3. Disconnect the Battery Inside the MacBook, locate the battery connector and use a spudger or plastic tool to disconnect it from the logic board. This step ensures that you won’t cause any electrical shorts or damage during the screen replacement. 4. Remove the Broken Screen Place the MacBook on a flat surface. You will need to remove the screws that hold the screen in place. These are typically located around the hinges and the edges of the MacBook. Use the appropriate screwdriver (likely a Pentalobe or Tri-point) to unscrew the screws. Once the screws are removed, use a suction cup or handle to carefully lift the display assembly. If necessary, use a plastic opening tool to gently separate the screen from the case. Be very gentle, as there are thin cables connected to the screen. 5. Disconnect the Display Cables After lifting the screen assembly, you will see the display cables that connect the screen to the logic board. Carefully disconnect these cables by lifting the connectors with a spudger or tweezers. Be extra cautious not to damage the delicate cables. 6. Remove the Old Screen Assembly Once all cables are disconnected, carefully remove the old screen from the laptop body. Set it aside, as you will need to install the new screen. 7. Prepare the New Screen Unbox the new screen carefully and make sure it is the correct part for your MacBook model (A2681). Check the new screen for any protective films or packaging that might need to be removed. 8. Install the New Screen Connect the display cables of the new screen to the logic board, ensuring the connections are secure. Be very gentle to avoid damaging the connectors. Once connected, place the new screen assembly in the proper position and align it with the hinges and mounting points. 9. Secure the Screen Use the screws you removed earlier to secure the new screen to the MacBook. Tighten them carefully, but avoid overtightening to prevent damaging the threads. 10. Reconnect the Battery Once the screen is in place, reconnect the battery connector to the logic board. This will allow the laptop to power on once you close it. 11. Close the MacBook Carefully align the bottom case back onto the MacBook. Reinstall all the screws using the Pentalobe screwdriver. Ensure all screws are tightly in place, but again, avoid overtightening. 12. Power On and Test the Screen Power on the MacBook and check if the new screen is working properly. Test the screen’s display, touch functionality (if applicable), and brightness controls. If everything works correctly, the screen replacement is complete. Final Notes: If you’re unsure or uncomfortable with the process, consider taking your MacBook to an authorized repair center or a professional technician. Apple’s warranty may be voided if you perform the repair yourself, so it’s good to consider alternatives if you’re still under warranty. Be cautious of the environment; static electricity can damage the internal components, so it’s always a good idea to work on an anti-static mat or use an anti-static wrist strap. By following these steps carefully, you should be able to replace the screen on your MacBook A2681. Not confident enough bring it to applefix & tech engineers Hamilton New Zealand @ 937 victoria street Hamilton New Zealand